
Did you know that approximately 65% of homeowners prefer shower trays over traditional bathtubs? If we’re one of those individuals looking to install a shower tray on floorboards, Unity Metal has got you covered. In this article, we’ll guide you through the process step by step, ensuring a secure and level installation. From preparing the floorboards to securing the tray in place, our expert tips will help you achieve a professional result. So let’s get started and transform our bathroom into a modern oasis!
Preparing the Floorboards
You’ll want to ensure the floorboards are clean and free of any debris before moving on to the next step. This is an important part of preparing the foundation for your shower tray. To begin, we recommend sweeping or vacuuming the floor to remove any loose dirt or dust. Next, grab a damp cloth or mop and give the floorboards a good wipe down. This will help remove any stubborn stains or spills that may have accumulated over time.
If you notice any cracks or holes in the floorboards, it’s crucial to address them before proceeding. You can use wood filler or putty to fill in these imperfections, ensuring a smooth surface for your shower tray installation.
Once you’ve cleaned and repaired any damage, it’s time to check the levelness of your floorboards. Grab a spirit level and place it in various spots across the area where your shower tray will sit. If you find any uneven areas, you can use shims or wedges to adjust and level out the surface.
Lastly, double-check that there are no loose nails sticking out from the floorboards. Hammer them down if necessary to avoid any potential hazards during installation.
Measuring and Marking the Shower Tray Placement
To accurately position the shower tray, it’s important to measure and mark the desired placement on the floorboards. This step ensures that the tray fits perfectly in your bathroom and allows for proper drainage. Here at DIY Home Renovations, we understand the importance of precise measurements when it comes to installing a shower tray.
To help you with this process, we have created a simple table below outlining the necessary measurements for different sizes of shower trays:
| Shower Tray Size | Length (inches) | Width (inches) |
|---|---|---|
| 900mm x 900mm | 35.4 | 35.4 |
| 1200mm x 800mm | 47.2 | 31.5 |
| 1500mm x 760mm | 59.1 | 29.9 |
Using a tape measure, start by measuring the length and width of the area where you plan to install your shower tray. Once you have these measurements, transfer them onto your floorboards using a pencil or marker. Make sure to double-check your markings for accuracy before moving on to the next step.
Applying the Sealant and Adhesive
Before applying the sealant and adhesive, make sure to thoroughly clean the area where the shower tray will be installed. Cleaning is an essential step that ensures proper adhesion and prevents any dirt or debris from interfering with the bonding process. Here are a few things we found helpful when preparing to apply the sealant and adhesive:
- Gather your supplies: Make sure you have all the necessary tools and materials at hand before starting. This includes the sealant, adhesive, caulking gun, gloves, and a clean cloth.
- Remove any old sealants: If there’s any existing sealant or adhesive on the floorboards, it’s important to remove it completely before applying new ones. Use a scraper or a putty knife to carefully scrape off any residue.
- Cleanse with soap and water: Thoroughly wash the area with soap and water to remove any dirt, grease, or grime. Rinse well afterward and allow it to dry completely.
- Use alcohol for final cleaning: To ensure a pristine surface for bonding, wipe down the cleaned area with rubbing alcohol. This will help remove any remaining traces of impurities.
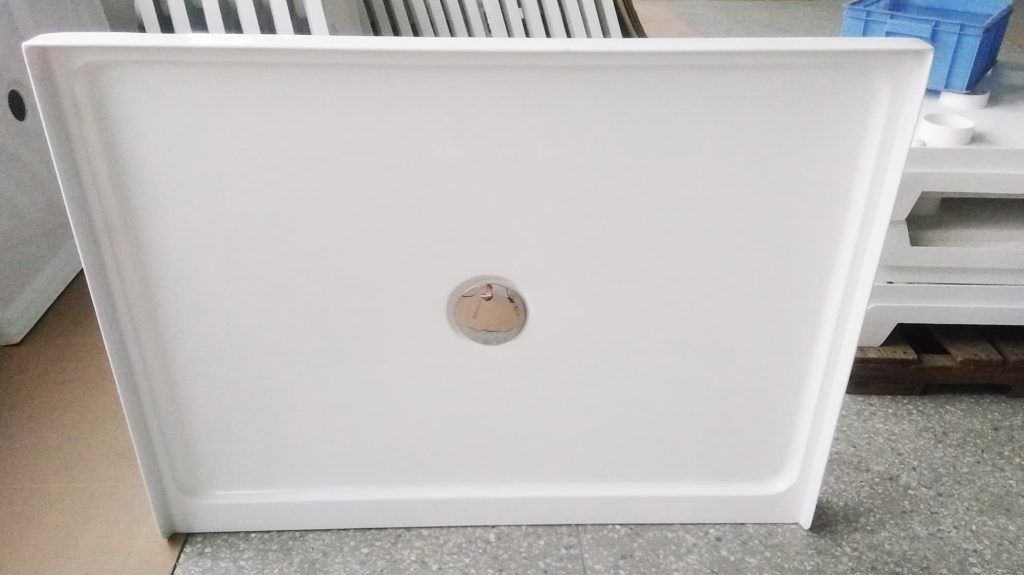
Placing and Leveling the Shower Tray
Once the area is prepared and cleaned, it’s important to ensure that the shower tray is placed accurately and leveled correctly. We start by carefully positioning the shower tray in its designated location. This involves lifting it and placing it onto the floorboards, making sure it fits snugly against the walls or within any framing. We then check for any gaps between the tray and the floorboards, using shims if necessary to provide additional support.
Next, we use a spirit level to ensure that the shower tray is perfectly level. This step is crucial because an uneven surface can lead to water pooling or drainage issues. We adjust the position of the tray as needed, adding or removing shims until we achieve a level surface.
Once we are satisfied with the placement and leveling of the shower tray, we secure it in place using screws or adhesive, depending on manufacturer instructions. It’s important to follow these instructions carefully to avoid damaging the tray or compromising its stability.
Securing the Shower Tray to the Floorboards
Make sure you secure the shower tray firmly to the floorboards using screws or adhesive, following the manufacturer’s instructions. This step is crucial to ensure that your shower tray stays in place and doesn’t move around when you’re taking a shower. Here are some tips and tricks we’ve learned from our own experiences:
- Measure twice, drill once: Before securing the shower tray, double-check its position and alignment. Measure the distance between the edges of the tray and make sure it’s centered properly.
- Use appropriate screws or adhesive: Depending on your shower tray’s design and material, choose the right type of screws or adhesive recommended by the manufacturer. This will provide maximum support and prevent any potential leaks.
- Apply pressure evenly: When attaching screws or applying adhesive, distribute pressure evenly across all areas of the shower tray. This will help ensure a secure bond without causing any damage to the floorboards.
- Follow manufacturer’s guidelines: Each shower tray may have specific instructions provided by its manufacturer. It’s important to carefully read and follow these guidelines to guarantee proper installation.
Frequently Asked Questions
How Do I Ensure That the Shower Tray Is Waterproof?
To ensure the shower tray is waterproof, we need to properly bed it on the floorboards. This involves using a strong adhesive or sealant and ensuring that there are no gaps or cracks for water to seep through.
Can I Install a Shower Tray on Uneven Floorboards?
Sure, we can install a shower tray on uneven floorboards. First, ensure the floor is level by using shims or self-leveling compound. Then, bed the tray with silicone sealant for a waterproof and secure fit.
What Tools Do I Need to Install a Shower Tray on Floorboards?
To install a shower tray on floorboards, we’ll need a few tools. These include a tape measure, screwdriver, spirit level, drill, silicone sealant, and a saw to trim the tray if necessary.
Can I Install a Shower Tray Without Removing the Existing Floorboards?
Yes, you can install a shower tray without removing the existing floorboards. We’ve done it before and it’s fairly straightforward. Just make sure to properly bed the tray with a suitable sealant for a secure installation.
How Long Does It Take for the Sealant and Adhesive to Dry Before I Can Use the Shower Tray?
It usually takes forever for the sealant and adhesive to dry. We have found that waiting at least 24 hours is best before using the shower tray to ensure a secure and watertight installation.
Conclusion
To sum up, bedazzling a shower tray on floorboards is like delicately placing a sparkling jewel on a precious crown. With careful preparation, precise measurements, and expert application of sealant and adhesive, the Unity Metal shower tray becomes an integral part of our bathroom’s majestic ensemble. By securing it firmly to the floorboards, we ensure its stability and longevity. So let us embark on this regal quest, transforming ordinary floorboards into a sturdy foundation for our exquisite shower experience. Let the beauty of craftsmanship reign supreme!

